Instalar Domoticz en Raspberry con Razberry
So, like us, you’re into the fantastic world of Z-Wave, which is a great wireless technology for the whole Internet of Things and home automation fields. We will guide you step by step how to install the home automation software ”Domoticz” on to your Raspberry equipped with the Z-Wave add-on card called Razberry (easy to mix up Raspberry and Razberry). We like Domoticz because it has a relatively intuitive and nice looking user interface.
What do you need to get Domoticz up and running with your Raspberry and Razberry?

- A Raspberry Pi (we use version 2). To install Domoticz, we’ll connect remotely to our Raspberry using the command line interface on our Mac. If you need guidance how to remotely connect to your Raspberry, follow these steps.
- The Razberry add-on card
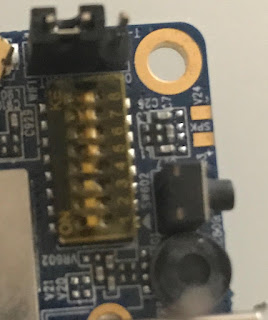
Plugging in the Razberry add-on card on top of our Raspberry
A good rule of thumb is to always unplug the power from your Raspberry before you plug in or unplug keyboards, mouse, ethernet cables etc. So we unplug the power and then carefully plug in the Razberry card on top of our Raspberry’s GPIO pins 1-10.

The GPIO pins are the pins facing upwards located along the upper side of the Raspberry in the above image. Now, that’s it hardware wise. Make sure the ethernet cable is connected to your home network and then power up the Raspberry again.
Installing the Domoticz software
It’s recommended to make sure the operating system files on your Raspberry is up to date. Here is a guide how you make sure your Raspberry is up to date. Once your Raspberry is powered on, we’re going to install the Domoticz software. We log in to our Raspberry from our laptop. To install the Domoticz software we type the commands below. This creates a folder a installs the software. Note! the character ”l” in ”armv7l” is not a one, it’s the letter ”l”.
   mkdir ~/domoticz
   cd ~/domoticz
   wget http://domoticz.sourceforge.net/domoticz_linux_armv7l.tgz
   tar xvfz domoticz_linux_armv7l.tgz
   rm domoticz_linux_armv7l.tgz
Make Domoticz start up when Raspberry starts up
Type these commands to make the Domoticz service start up when your Raspberry starts up:
   sudo cp domoticz.sh /etc/init.d
   sudo chmod +x /etc/init.d/domoticz.sh
   sudo update-rc.d domoticz.sh defaults
Reboot your Raspberry by typing:
sudo reboot
Now connect with a browser on your laptop to see if Domoticz is up and running. In the address field of your browser on your laptop, enter the IP address of your Raspberry followed by ”:8080” . In our case it’s ”192.168.1.99:8080”. It should look like this:

Making Domoticz aware of our Razberry add-on card
Domoticz is made for Z-Wave hardware connected on the USB ports of the Raspberry. Since our Razberry add-on card is connected to the GPIO pins and not a USB port, we need to make a small configuration within Domoticz so Domoticz can speak to the Razberry add-on card. Type the following command in the command line interface:
sudo nano /etc/udev/rules.d/09-tty.rules

This will open up a basic text editor where you should enter the following text. Press ctrl + O to save the file, and press ctrl + X to exit the text editor.
You have now created a link to a port that Domoticz can use to speak to your Razberry add-on card. Then restart your Raspberry:
sudo reboot
Configuring Domoticz from the web interface
Once the Raspberry has restarted, we access the Domoticz web interface again by entering the IP address of our Raspberry + portnumber 8080 in the address field of our web browser on our laptop. In our case it’s 192.168.1.99:8080.

Go to the Setup menu and select Hardware.

Make sure ”Enabled” is ticked, and select a name of your choice in the ”Name” field. We choose ”Razberry”. From the drop-down list ”Type”, select ”OpenZWave USB”, and from the drop-down list ”Serial Port” select ”/dev/ttyUSB20”. You probably recognize this as the link we created using the text editor. Finally click ”Add”.

Your Razberry can now speak to Domoticz. Well done! In future posts we will go through how to add your first Z-Wave devices using Domoticz.


Comentarios